
How to Make a Timesheet in Excel You Won't Hate
Learn how to make a timesheet in Excel that actually works. A friendly guide to formulas, breaks, and overtime without the usual spreadsheet headaches.
Dan Robin

Let's be honest. You’re probably here because your time tracking is a mess. Maybe it’s a stack of paper timesheets, a flurry of emails, or an old Excel file that crashes more than it calculates.
I’ve been there. When I started my first business, I thought a simple spreadsheet would solve our payroll problems. For a little while, it felt like a huge leap from scribbled notes and pure guesswork.
Excel became the default for millions of small businesses, not because it was built for time tracking, but because everyone already had it. It’s the digital version of a hammer—it’s in every toolbox, and you can use it for almost anything if you try hard enough. But that convenience comes at a price.
I can’t count the hours I’ve lost fixing broken formulas, chasing down employees for their hours, or trying to reconstruct what happened during a shift to sort out a payroll dispute. The spreadsheet that was supposed to save time became a time-sucking chore.
The real problem isn't just building the timesheet; it's the human side of it. A spreadsheet can't remind someone to clock out or flag an entry that looks off. It just sits there, silently waiting for perfect data that never arrives.
Why We Still Cling to Spreadsheets
Excel timesheets were a revelation when they first appeared. In the mid-2000s, studies showed that over 60% of small businesses were using them, saving their HR teams an average of 15 hours a month on manual math.
The habit stuck. A recent QuickBooks report found that a surprising 75% of its users still use Excel templates for time tracking. But here’s the thing: the same report reveals that manual entry errors cause problems for 40% of those teams, leading to payroll fights and expensive fixes. If you want to see what a standard one looks like, Collage.co offers a free timesheet template that's a good starting point.
The Basic Building Blocks of Any Good Timesheet
Before we start building, let’s agree on what a timesheet absolutely needs. Forget the fancy features for a moment. At its core, a functional timesheet just needs a few key columns:
Date: The day the work happened.
Time In: When the shift started.
Time Out: When the shift ended.
Breaks: Total unpaid break time (in hours or minutes).
Total Hours: The final calculated hours worked.
This simple structure is your foundation. Getting this right is the first step. But this is just where the story begins. Now, let’s make it actually work.
Let's Build a Timesheet That Actually Works
Alright, let's turn a blank Excel sheet into something useful. We’re going to skip the complex templates you find online and build a clean, reliable weekly tracker from scratch.
Think of this as a hands-on workshop. I'm going to walk you through the process I use, focusing on a solid foundation you can understand, trust, and customize later.
So many people go from messy paper timesheets to a slightly-less-messy spreadsheet, only to create a new set of payroll headaches. It’s a classic problem.
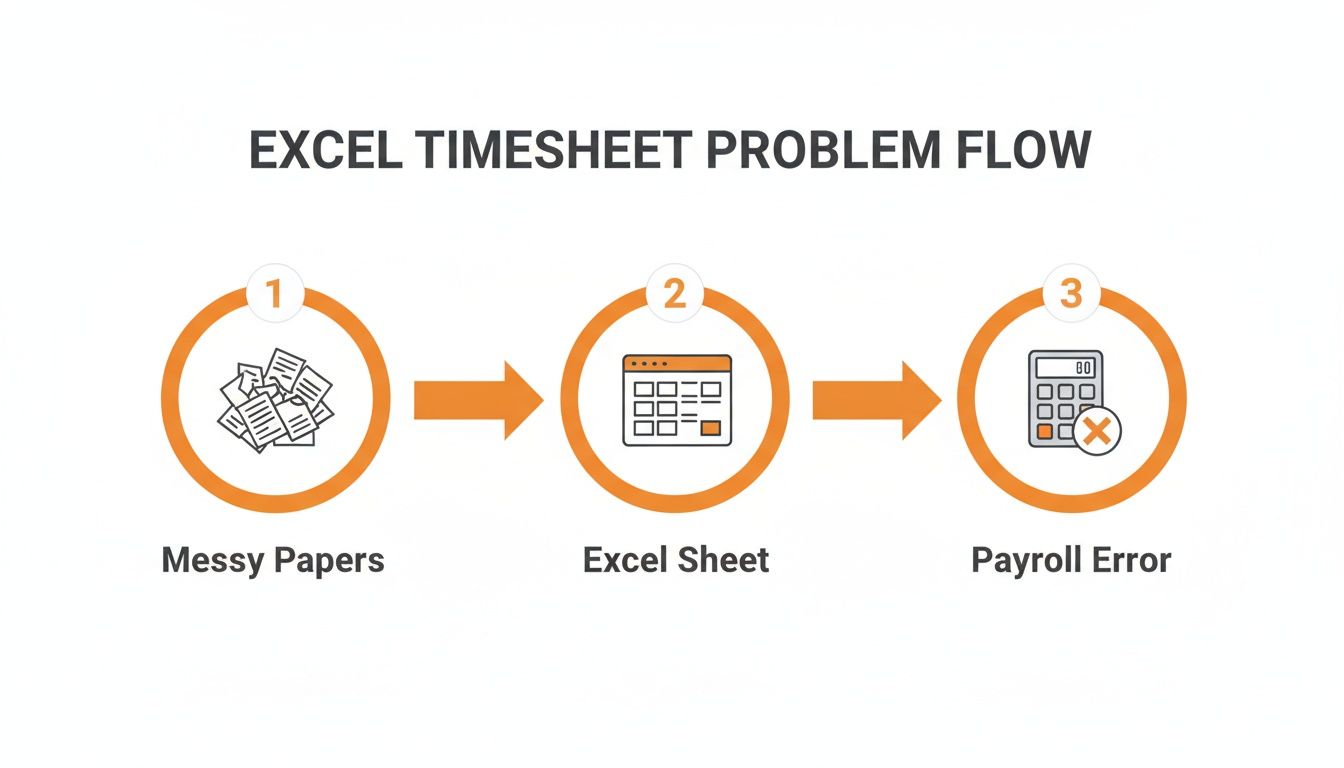
This familiar path often leads to manual errors and payroll nightmares. Our goal is to make that middle step—the Excel sheet itself—as solid as possible.
First, The Layout
Before we touch a single formula, let's get the structure right. A good layout is key to a timesheet that’s easy to use and hard to mess up.
Open a new workbook and put these headers in the first row:
Date (in cell A1)
Time In (in cell B1)
Time Out (in cell C1)
Lunch Break (Hours) (in cell D1)
Total Hours (in cell E1)
This simple setup captures everything you need for accurate pay calculations without the clutter. It’s practical and to the point.
Now for a crucial step that trips people up: cell formatting. Select your Time In and Time Out columns, right-click, and go to "Format Cells." Under the "Time" category, find a format like 1:30 PM.
Why is this so important? If you don't format these cells, Excel sees "9:00" as text, not a specific time of day. This ten-second step will save you hours of troubleshooting broken formulas. You're telling Excel what kind of data to expect.
The Magic Formula for Calculating Hours
With our sheet structured, it’s time for the fun part. We're going to add the one core formula that does all the heavy lifting.
Click on cell E2 (the first empty cell under "Total Hours") and type this in:
=((C2-B2)*24)-D2
Let’s quickly break that down so you understand what it’s doing.
(C2-B2): This subtracts the Time In from the Time Out. Excel gives you the result as a fraction of a 24-hour day (e.g., 8 hours is 0.333).
*24: To turn that fraction into a number we can use, we multiply it by 24. Our 0.333 becomes a clean 8 hours.
-D2: Finally, the formula subtracts any time taken for a lunch break, which we enter as a decimal (e.g., 0.5 for 30 minutes).
Once the formula is in E2, grab the small square in the bottom-right corner of the cell and drag it down for the rest of the week. Excel automatically updates the formula for each row. Perfect.
Essential Excel Timesheet Formulas
To build a truly functional timesheet, you only need a couple of key formulas. Here’s a quick-reference table for the ones we're using.
Calculation | Excel Formula | Explanation |
|---|---|---|
Daily Total Hours |
| Subtracts start from end time, converts the result to hours, and subtracts the lunch break. |
Weekly Total Hours |
| Adds up all daily hour totals in a given range (e.g., E2 through E8) for a weekly sum. |
Total Pay |
| Multiplies total hours (in cell F9) by the hourly rate (in cell G1) to calculate gross pay. |
These simple formulas are the building blocks of your entire timesheet. Master them, and you can create and troubleshoot any timesheet you encounter.
To finish your sheet, find an empty cell below your "Total Hours" column, maybe E9, and get your weekly total with this formula: =SUM(E2:E8). This adds up all the daily hours.
And there you have it—a clean, working timesheet built on simple, understandable logic. It’s a reliable starting point you can now expand on with confidence.
Calculating Overtime and Pay Automatically
A basic timesheet that just adds up hours is fine, but it doesn't help much when payroll comes around. The real headache is overtime. Once you account for different pay rates, simple addition goes out the window. This is where most DIY Excel timesheets fall apart.
So, let's build a smarter timesheet. We'll use one of Excel's most practical tools, the IF statement, to get the job done. It's just a simple logical test that lets Excel make a decision for you.
Separating Regular and Overtime Hours
First, we need to add two new columns to our sheet: one for Regular Hours and another for Overtime Hours. Instead of lumping all hours together, we're splitting them. This is the secret to getting the pay calculation right.
Let's assume your total hours for the day are in cell E2. In your new "Regular Hours" column (we'll use F2), you’ll add this IF formula:
=IF(E2>8, 8, E2)
This tells Excel, "Check the hours in cell E2. If it's more than 8, just put 8 in this cell. If not, show me the number from E2." This caps the regular hours for the day.
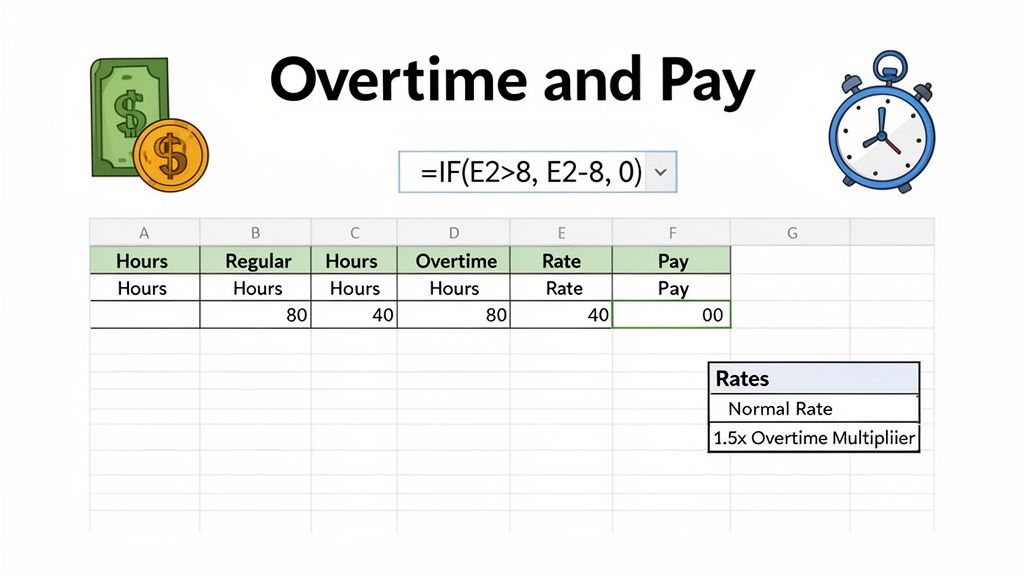
Now for the "Overtime Hours" column (let's say G2). We'll use a similar formula to grab anything that went over:
=IF(E2>8, E2-8, 0)
This one says, "If the hours in E2 are greater than 8, subtract 8 from the total to find the overtime. Otherwise, just enter 0." And just like that, you've automated your overtime tracking.
From Hours to Gross Pay
With our hours sorted, calculating gross pay is the next step. I’ve found the best way to do this is to create a small 'Rates' table somewhere else on your sheet. Create two cells: one for the Regular Rate (e.g., $20) and one for the Overtime Rate (typically the regular rate multiplied by 1.5).
Why do this? It's a huge time-saver. By keeping your rates in separate cells, you can update pay for an employee in one place without digging through a dozen formulas. It makes your spreadsheet much more robust. Once you nail this, you can even apply the same ideas to calculate direct labor cost for specific projects.
Making this jump from simple sums to conditional logic is what separates a basic tracker from a real payroll tool. Even now, data shows that templates using a 1.5x overtime multiplier are relied on by roughly 35% of global firms to stay compliant with labor laws. For a look at how complex these can get, check out these modern timesheet templates from QuickBooks.
Once your rates are set, you're ready to add a "Daily Pay" column. The formula here is just simple multiplication and addition:
(Regular Hours * Regular Rate) + (Overtime Hours * Overtime Rate)
You now have a timesheet that doesn't just count hours—it calculates actual pay. This is where you start to see the real potential of Excel. But as you add more features, the formulas can get tangled. It’s a powerful setup, but it requires attention to detail.
Making Your Timesheet Error-Proof and User-Friendly
So far, we've built a functional timesheet. It does the math, but let's be honest—it’s fragile. It relies on everyone entering their data perfectly, and in the real world, that doesn’t happen. Typos, formatting mistakes, and impossible times are practically guaranteed.
This is where we go from building a spreadsheet to building a smart, durable tool. We're about to add some guardrails to catch those common human errors before they mess up your payroll.
Stop Bad Data with Validation
Our first line of defense is one of Excel's most underrated features: Data Validation. This tool lets you set strict rules for what can be entered into a cell.
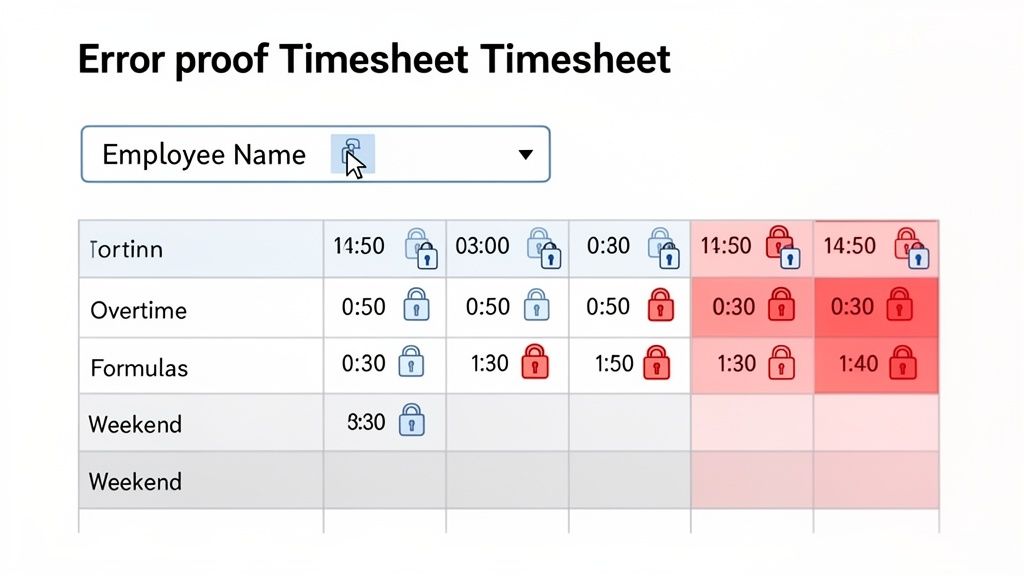
I've seen it a hundred times. You have a column for employee names, and by the end of the month, you have "John Smith," "J. Smith," and "John S." all referring to the same person. Trying to run a report on that is a nightmare. We can fix this with a drop-down list.
First, create a list of your employee names on a separate, hidden sheet. Next, select the cell where you want the drop-down to appear in your timesheet. Head over to Data > Data Validation. Under the "Allow" dropdown, choose List, and for the "Source," select the range containing your list of names.
Just like that, users can only select a name from the list. No more typos. No more variations. You get clean, consistent data every time.
You can also use validation to prevent impossible time entries. For instance, set a rule on the "Time In" column to only allow times between 5:00 AM and 11:00 PM. This small tweak makes it impossible for someone to accidentally log '9:00 PM' when they meant '9:00 AM'—a simple mistake that can cause big headaches.
Make Key Information Pop with Conditional Formatting
Next, let's make your timesheet easier to read with Conditional Formatting. This feature automatically changes a cell's appearance based on what's inside it. It helps you see the story behind the numbers at a glance.
Think about how much easier life would be if all overtime hours automatically turned red. Or if weekend shifts were highlighted in gray. These visual cues are powerful. A manager can spot potential burnout or budget issues in seconds, without scrutinizing every single number.
Here's how to highlight overtime:
Select your "Overtime Hours" column.
Go to
Home > Conditional Formatting > Highlight Cells Rules > Greater Than...In the box, enter 0 and choose your preferred formatting, like a light red fill.
Boom. Any day with overtime now jumps right off the page. This is how you make a timesheet that helps people, rather than just being another piece of admin.
My biggest takeaway from years of building these: An Excel timesheet is more than just formulas; it’s an interface for people. The more intuitive and error-proof you make it, the more you can trust the data. It's all about human-centered design.
Lock It Down: Protecting Your Formulas
After all this work, the last thing you want is for someone to accidentally click into a cell and delete a critical formula. Trust me, it happens. That's why we have the Protect Sheet function.
But before you lock everything, you need to decide which cells people are allowed to edit. These are typically the time in/out fields and maybe a notes section.
To do this, just select the cells employees need to fill in, right-click, and choose "Format Cells." On the "Protection" tab, you'll see a box for "Locked"—make sure you uncheck it.
Once you’ve unlocked the entry cells, head to the Review tab and click Protect Sheet. You can even add a password. Now, your formulas are safe, but your team can still enter their hours.
You’ve officially created a timesheet that is both powerful and practically unbreakable. For teams managing lots of employees, these protected sheets can be a fantastic starting point before moving to a dedicated digital form for employees to submit their time.
The Breaking Point: When Excel Is No Longer Enough
We've just built a powerful timesheet. It’s smart, it calculates pay, and it even has some solid error-proofing. But let’s have a frank conversation. As your team grows, this very spreadsheet will become your biggest bottleneck.
It's a fantastic tool when you're small. For a handful of people, it’s perfect. But what happens when you have 20, 50, or even 100 employees? Who will manage all those files? How will you track paid time off or handle last-minute shift swaps without pulling your hair out?
This is the breaking point. The moment when the tool you built to create order actually starts creating chaos.
When the Math Doesn't Add Up
The hidden costs of sticking with Excel for too long are real, and they add up faster than you'd think. It isn't just about catching a formula error. It’s the slow, compounding effect of tiny inefficiencies that spread across your team.
On average, employees spend about 15 minutes a week just on manual time entry in spreadsheets. That might not sound like much, but for a 20-person crew, that's over 50 hours a year just filling out a spreadsheet. And when manual entry error rates hover around 30%—thanks to forgotten breaks or simple typos—you aren't just losing time. You're losing money and accuracy.
The problem gets worse in busy environments like hospitality, where our work at Pebb is focused. I've seen studies showing that Excel-based timesheets caught only 55% of overtime hours accurately. That’s a massive compliance risk waiting to happen.
This isn't about bashing Excel. It's a brilliant piece of software. The point is to be honest about when you’ve outgrown it. The goal isn’t a better spreadsheet; it’s a better system.
When your timesheet needs outpace what Excel can reasonably handle, it might be time to look into replacing spreadsheets with a dedicated system. This is the moment you should stop wrestling with complex IF statements and start looking for a tool that automates tracking, scheduling, and communication all in one place.
If you’re feeling this pain, you're not alone. It’s a natural part of growing a business. The real question is what you do next. Do you keep patching the old system, or do you start exploring better employee time tracking software designed for the scale you're aiming for?
A Few Common Timesheet Questions
Building a solid timesheet is one thing, but the real world always throws a few curveballs. After helping countless people with their spreadsheets, I've seen the same tricky situations pop up again and again. Let's tackle a few of the most common.
How Do I Calculate Hours Worked Across Midnight?
This is the first problem almost everyone runs into. You use a simple End Time - Start Time formula, and everything looks great until someone works a night shift. The moment the end time is on the next calendar day (like 10 PM to 6 AM), Excel gets confused and spits out ugly #VALUE! errors.
Luckily, there's an elegant solution. Instead of a simple subtraction, you use the MOD function.
The secret sauce is this formula: =MOD(C2-B2,1)*24
In this example, C2 holds your end time and B2 has the start time. The MOD(...,1) part is the magic. It prevents Excel from seeing time as a negative value by treating the 24-hour clock as a continuous loop. This one little change makes the formula work perfectly, no matter the shift.
What Is The Best Way To Handle Paid And Unpaid Breaks?
Your break policy probably isn't one-size-fits-all, so your timesheet shouldn't be either. The cleanest way I’ve found to handle this is by adding a simple helper column, maybe with a heading like “Unpaid Break?” where you can enter "Y" or "N".
Then, you can build a little logic right into your total hours formula using an IF statement. Something like this would work: =((EndTime - StartTime) * 24) - IF(E2="Y", LunchDuration, 0).
This formula calculates the total shift duration, then it checks your helper column (column E in this case). If it sees a "Y" for an unpaid break, it subtracts the lunch duration. If not, it subtracts zero, leaving the paid break time in the total. It’s a small addition that adds a ton of flexibility.
The real goal is to make your spreadsheet mirror how your business actually operates. If your policies have nuances, building in small bits of logic like this is what elevates a basic spreadsheet into a genuinely useful tool.
Can I Automatically Import My Excel Timesheet Into Payroll Software?
This is where the rubber meets the road. The short answer is maybe.
Most modern payroll platforms, like QuickBooks or ADP, can import data from a CSV file. The good news is you can save any Excel sheet as a .csv file with just a couple of clicks.
The challenge, however, is formatting. Your payroll software needs the data in a very specific layout. It will expect columns like Employee Name, Pay Period, and Regular Hours to be in a precise order and have exact names. I’ve spent more hours than I’d like to admit creating separate "Export" tabs in a workbook—a special sheet designed solely to arrange the data perfectly for that CSV file. It's a manual process and, frankly, a major point of failure.
At Pebb, we believe your tools should simplify your work, not add extra steps. If you’re getting tired of wrestling with CSV files and worrying about manual import errors, it might be time for an app that handles timesheets, scheduling, and team communication all in one place. See how Pebb can unify your team’s workflow.
